

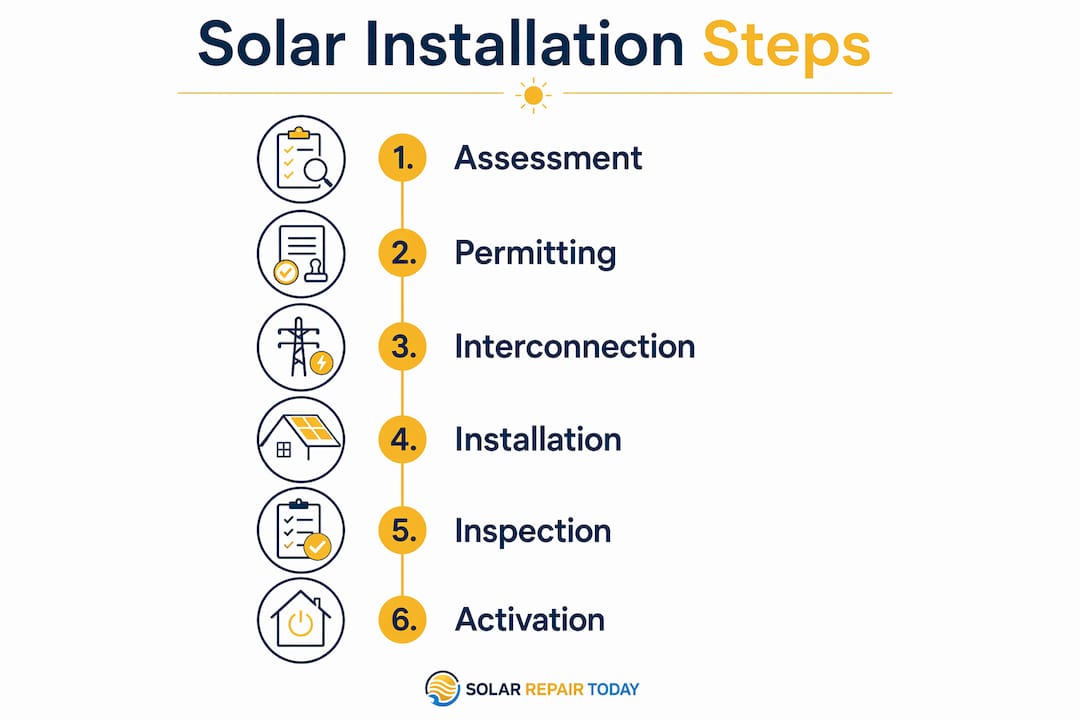
The solar installation process is a regulated, multi-phase sequence that moves from site assessment through permitting, physical installation, municipal inspection, and utility approval before your system legally produces power. Most homeowners expect panels on the roof to mean power in the home. The reality is more layered. Understanding the solar panel installation steps before you sign a contract protects your timeline, your budget, and your legal standing with your utility.
What are the main steps in the solar panel installation process?
The solar installation process explained in full covers six distinct phases. Each phase has its own timeline, its own stakeholders, and its own failure points.
-
Site assessment and system design. A certified installer evaluates your roof condition, orientation, shading, and electrical panel capacity. This phase produces the system design documents used for permitting. System sizing directly affects how many panels you need and where they go.
-
Permitting. Your installer submits building and electrical permit applications to your local Authority Having Jurisdiction (AHJ). Standard permit review takes two to six weeks, though jurisdictions using SolarAPP+ fast-tracking can reduce that to minutes for code-compliant designs. SolarAPP+ was developed by NREL and the DOE specifically to cut residential permit delays.
-
Utility interconnection application. Separate from the municipal permit, this application goes directly to your utility. It requests permission to connect your system to the grid. Processing times vary by utility, from two weeks to several months.
-
Physical installation. Crews mount racking hardware, place panels, run DC wiring, install the inverter, and connect the AC side to your breaker panel. Physical installation takes one to three days for most residential systems.
-
Municipal inspection. A city or county inspector visits the site to verify code compliance. Passing this inspection is required before any further steps proceed.
-
Utility Permission to Operate (PTO) and system activation. After the inspection passes, your installer submits documentation to the utility. The utility schedules a meter exchange if needed and issues PTO. Utility PTO adds two to six weeks post-installation before you can legally turn the system on.
Pro Tip: Ask your installer on day one whether they submit the utility interconnection application at the same time as the municipal permit. Waiting to apply sequentially adds weeks to your total timeline.
How do permitting and utility approvals impact the solar installation timeline?
Permitting and utility approval are the two biggest sources of delay in any solar project. They are also the least visible to homeowners during the sales process.
The municipal permit covers structural and electrical safety. It references NEC Article 690, which sets requirements for rapid shutdown devices, labeling, grounding, and disconnects. Inspectors commonly fail systems for missing labels or improperly installed rapid shutdown components. These are not minor issues. A failed inspection restarts the review clock.
The utility interconnection agreement is a separate legal document. It governs how your system connects to the grid and what happens when it exports power. Utilities process these applications on their own schedule, independent of your permit status.
| Approval type | Governing body | Typical timeline | Common delay cause |
|---|---|---|---|
| Building/electrical permit | Local AHJ | 2 to 6 weeks (minutes with SolarAPP+) | Incomplete design documents |
| Utility interconnection | Electric utility | 2 to 12 weeks | Queue backlog, missing paperwork |
| Permission to Operate (PTO) | Electric utility | 1 to 6 weeks post-inspection | Meter exchange scheduling |
Starting permits and utility applications simultaneously reduces total project timeline because utilities process applications independently of the AHJ. Waiting until permits are approved to submit the interconnection application adds unnecessary weeks to your project.
Key factors that cause permit and approval delays:
- Incomplete or incorrect system design documents submitted to the AHJ
- Jurisdictions without SolarAPP+ integration requiring manual plan review
- Utility queue backlogs, particularly in high-growth solar markets
- Missing rapid shutdown labeling or grounding documentation
- Meter exchange scheduling delays on the utility side
Pro Tip: Request written confirmation from your installer that both the permit application and the utility interconnection application have been submitted. Get the submission dates and reference numbers for both.
What technical steps happen during the physical solar installation?
Physical installation is the most visible phase, but it is also the most technically precise. A crew that cuts corners here creates inspection failures and long-term performance problems.
The sequence on installation day follows a strict order:
- Safety setup. Crews establish fall protection, de-energize the main panel, and conduct a final roof inspection for structural integrity before any hardware goes up.
- Mounting rail installation. Lag bolts attach rail brackets to roof rafters at specific torque specifications set by the racking manufacturer. Improper torque is a common inspection failure point.
- Panel placement and mechanical attachment. Panels clip onto the rails using mid and end clamps. Each connection point has a manufacturer-specified torque value.
- DC wiring and string configuration. Panels connect in series strings using MC4 connectors. String voltage and current must stay within the inverter's input specifications.
- Inverter installation. String inverters mount near the main panel, typically in a garage or utility room. Microinverters or power optimizers mount directly under each panel on the roof.
- AC connections and breaker installation. The inverter output connects to a dedicated breaker in the main panel. Grounding conductors run from the array to the grounding electrode system.
- Labeling. NEC 690 requirements mandate specific warning labels at the inverter, disconnect, conduit, and panel. Missing labels are the most common reason inspections fail.
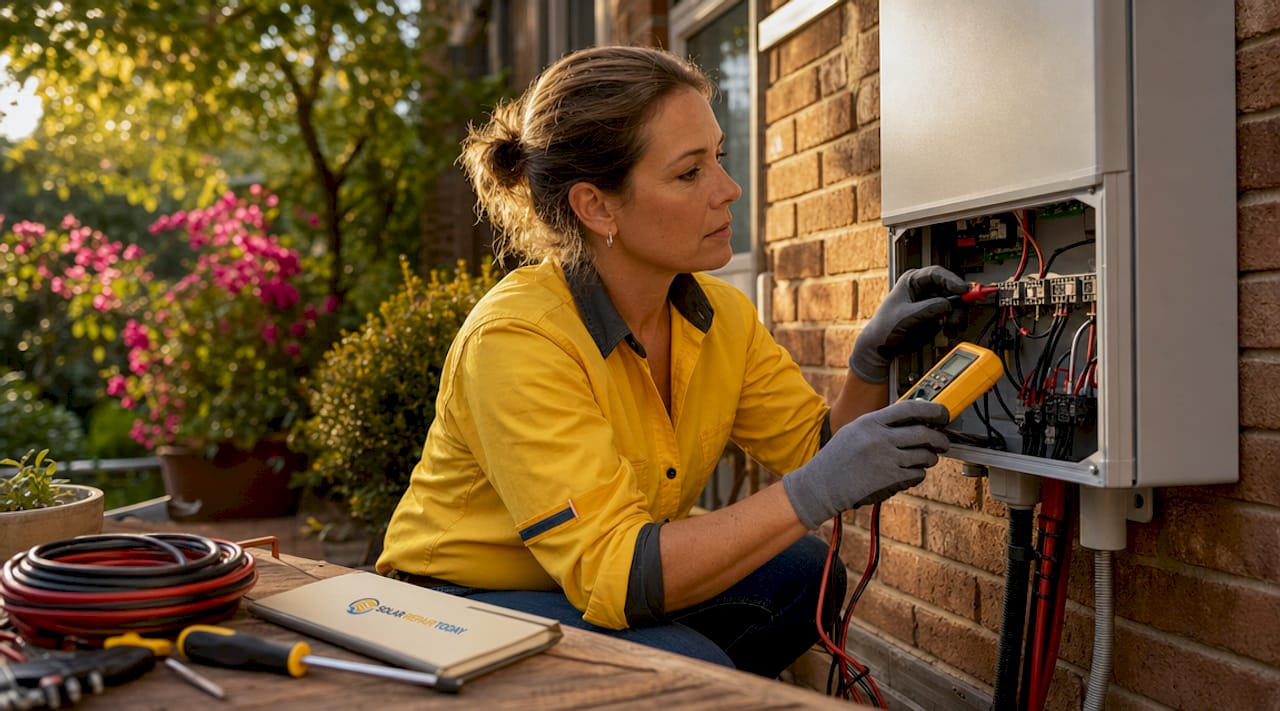
After physical installation, experienced installers run commissioning tests before calling for inspection. IEC 62446 commissioning includes visual inspection, polarity checks, insulation resistance testing, earth continuity verification, and functional inverter tests. These tests catch wiring errors before an inspector or the utility sees the system.
| Commissioning test | What it checks |
|---|---|
| Visual inspection | Mechanical connections, labeling, conduit routing |
| Polarity check | Correct positive/negative DC wiring |
| Insulation resistance | Wire insulation integrity |
| Earth continuity | Grounding system effectiveness |
| Functional inverter test | Startup, shutdown, and output verification |
What happens after installation until your solar system is operational?
The gap between installation completion and system activation surprises most homeowners. Panels on the roof does not mean power in the home. Systems may be physically installed but must wait weeks or months for PTO before legal operation.
The post-installation sequence works as follows:
- Schedule municipal inspection. Your installer contacts the AHJ to schedule an inspection. Wait times range from a few days to two weeks depending on the jurisdiction.
- Pass inspection. The inspector verifies NEC 690 compliance, structural attachment, and labeling. Any deficiency requires correction and re-inspection.
- Submit inspection results to the utility. After passing inspection, the installer submits the signed inspection card and any required documentation to the utility.
- Meter exchange. For net metering, the utility replaces your standard meter with a bidirectional meter that tracks both consumption and export. Scheduling this exchange is often the longest wait in the post-installation phase.
- Utility issues PTO. The utility reviews all submitted documentation and issues written Permission to Operate. This is the legal authorization to energize your system.
- System activation. Turn-on day involves flipping the AC disconnect, confirming inverter startup, and verifying output on the monitoring app.
Turning a system on before PTO voids the interconnection agreement, risks homeowner insurance coverage, and can void equipment warranties. No legitimate installer will recommend it.
Pro Tip: Track your utility interconnection application status directly with your utility, not just through your installer. Utilities accept status inquiries by phone or online portal, and missing paperwork is easier to catch early.
What factors influence costs and timelines during solar installation?
Several variables affect both the total cost and the total duration of a solar project. Understanding them helps you evaluate quotes and set realistic expectations.
Solar installation costs include permit fees, labor, equipment, and utility application fees. Permit fees vary widely by jurisdiction, from under $100 to over $500. Some utilities charge interconnection application fees separately.
Key cost and timeline variables:
- System size. Larger systems require more labor hours, more materials, and sometimes structural engineering review for roof load calculations.
- Roof complexity. Multiple roof planes, steep pitches, or tile roofing increase labor time and cost. Tile roofs require specialized mounting hardware and slower installation.
- Structural review. Older homes or roofs near their replacement age may require a structural engineer's sign-off before the AHJ approves the permit.
- Equipment availability. Supply chain delays on specific inverter models or panel brands can push installation dates back by weeks.
- Utility queue depth. High-growth solar markets like California, Texas, and Florida have utility queues that extend interconnection timelines beyond the national average.
- Seasonal factors. Winter months slow outdoor installation in northern states and can delay inspection scheduling due to reduced AHJ staffing.
Submitting permits and interconnection applications in parallel is the single most effective way to compress the total project timeline without cutting any required steps.
Key takeaways
The solar installation process requires sequential regulatory approvals from both the local AHJ and the utility before any grid-tied system can legally operate.
| Point | Details |
|---|---|
| Six-phase process | Assessment, permitting, interconnection, installation, inspection, and PTO are all required steps. |
| Physical install is fast | On-site installation takes one to three days; total project timeline runs six to twelve weeks. |
| Parallel applications save time | Submitting permits and utility interconnection simultaneously removes weeks from the timeline. |
| PTO is non-negotiable | Turning on a system before utility Permission to Operate voids insurance, warranties, and the interconnection agreement. |
| Commissioning tests prevent failures | IEC 62446 tests catch wiring errors before inspection, reducing callbacks and delays. |
What most homeowners don't realize until it's too late
The install-to-activation gap is the part of the solar process that generates the most frustration. Panels go up on a Tuesday. Nothing happens for six weeks. No one told you to expect that.
In my experience reviewing solar projects, the gap is almost always caused by one of two things: the utility interconnection application was submitted late, or the inspection documentation was incomplete when it reached the utility. Both are preventable with basic project management.
The other issue I see repeatedly is homeowners who don't know what questions to ask solar companies before signing. A good installer will tell you upfront that your system won't produce power for six to ten weeks after installation. If an installer promises activation within days of physical installation, that is a red flag. Either they don't understand the utility process, or they are planning to skip steps.
Verify that your installer pulls permits in your jurisdiction regularly. Ask them for the name of the AHJ contact they work with and how they handle failed inspections. These are not hostile questions. They are the questions a competent installer expects and answers without hesitation.
The regulatory steps exist for real reasons. NEC 690 labeling requirements prevent firefighters from getting electrocuted. Utility interconnection agreements protect grid stability. PTO protects you legally. The process is not bureaucratic friction. It is the structure that makes residential solar safe and insurable.
Stay engaged through every phase. Track your permit status. Track your interconnection application. Confirm inspection scheduling. The homeowners who have the smoothest installations are the ones who treat it like a construction project they are managing, not a service they ordered.
— David
Get an expert review before you commit
Solarrepairtoday's "Before You Sign" intake program gives you an independent review of your solar proposal before you commit to a contract. Submit your quote, utility bill, or project details and get a diagnostic review covering pricing, equipment, system sizing, battery backup options, and potential red flags. If you are unsure whether your installer's timeline or pricing is realistic, a solar contract financing review from Solarrepairtoday gives you the clarity to sign with confidence or walk away before it costs you. The service is built for homeowners who want a second opinion from someone with no stake in the sale.
FAQ
How long does the full solar installation process take?
Most residential solar projects take six to twelve weeks from signed contract to system activation. Physical installation takes one to three days, but permitting, inspections, and utility PTO add the remaining time.
Can I turn my solar system on before getting Permission to Operate?
No. Energizing a grid-tied system before utility PTO voids your interconnection agreement, risks your homeowner's insurance coverage, and can void equipment warranties.
What is SolarAPP+ and does it speed up my permit?
SolarAPP+ is an NREL and DOE-developed platform that automates residential solar permit approval in participating jurisdictions, reducing permit timelines from weeks to minutes for code-compliant systems. Not all jurisdictions use it.
What causes the most delays in the solar installation process?
Utility interconnection queue backlogs and incomplete permit documentation are the two most common causes of delay. Submitting both the municipal permit and the utility interconnection application at the same time reduces total project duration.
What is the difference between a municipal inspection and utility PTO?
A municipal inspection verifies that the physical installation meets local building and electrical codes. Utility PTO is a separate authorization from your electric utility that legally allows you to connect and operate the system on the grid.